Camp DIY: Stick Stringing Tips from the Pros

How To String a Lacrosse Head

The following instructions are for lacrosse mid-pocket heads for men’s lacrosse. This is the best pocket for attackmen, midfielders, and defensive players.
Did you know that the original laxers went as far back as 1100 A.D.? They built their own sticks from wood, leather, and other animal byproducts. The stringing resembled something like a large, egg-shaped fishing net with intricate knots that must have taken many days to complete. Since that time, head net stringing became a type of sports-based art form, with various techniques passed down for centuries.
While lacrosse head stringing is still an art form for many players, a lacrosse head stringing may be completed in under 1 hour with a little patience and attention to detail.
Let’s start with the basic elements of a lax stick stringing kit:
Mesh
You’ll want to look for a 9D, or 9 diamond, mesh. This is the pre-knotted piece that makes the pocket.
Pocket
The shape of the mesh. This controls how the ball sits in the head.
- Low pockets sit very close to the throat of the lax stick, for easier cradling and dodging with one-handed play.
- Mid Pockets are the most common, and best for any position. This style allows a lot of versatility with ball control and speed. For the purposed of this tutorial, we are going to use a Mid Pocket setup.
- High Pockets are used most often by defensive lacrosse players for control, covering ground balls, and making high or low shots on goal.
Sidewall
The long side of the head. These strings run along the sides of your lacrosse head.
Scoop
The top of the head
Shooting Strings
Shooting strings look like shoelaces. They are used to control how the ball comes out of the head when throwing or shooting.
Before you get started on stringing your lacrosse head, assemble your materials.
Here are some items you’ll need:
A mesh stringing kit. This includes:
- 1 Mesh
- 4-5 Sidewall nylon strings
- 2 Shooting strings
- 2-3 Shooting laces
- 1 Bottom lace
- 1 Bottom string
- 1 Screw
You’ll also need:
- The unstrung lacrosse head
- 1 Lacrosse ball
- Needle nose pliers
- Lighter (please ask an adult to help you)
- Scissors
Step 1 – The Mesh
Stretch out the mesh that comes with your kit. For a hard mesh, run the material under hot water while stretching it out for best results. Don’t skip this step! If you don’t stretch your lacrosse mesh, it will stretch eventually — in a way you didn’t intend.
Meshes feature holes that are called diamonds. Each row of the mesh has 9 diamonds across, or 10 diamonds across.
Step 2 – Top String
The top string is considered the foundation of your lacrosse stick. This string aligns the channel, and requires a symmetric, tight and even lacing. If the top string is loose, the pocket will also become loose and unreliable. If the top string is laced unevenly, your pocket will be crooked. This will result in erratic shooting and passing.
- Grab your lax stick head, and hold it with the open side facing away from you.
- Lay out the stretched mesh under the head of your lax stick. Ensure that the mesh is centered on the top holes and parallel to the side of the head. The mesh is laid down correctly when the strings make a vertical diamond pattern.
- Fold the top of the mesh down toward you, so the top row of diamonds line up with the second row. You should be able to see straight through the diamonds. The folded side of the mesh will face away from the open side of the head.
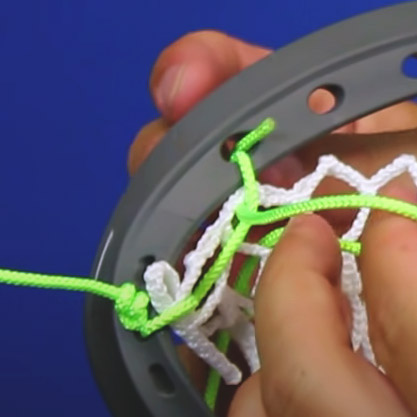
- Tie a double overhand knot at about 1/2 inch from the end of the top string. Starting from the left side, push the string through the first of the 9 top holes from the side facing you .
- Thread the top string through the top left diamond of the folded mesh, and push the string back through the same hole, so it loops around the side wall. Repeat this process and pull tight to lock that first mesh hole down.
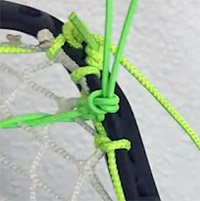
- Then thread the top string from the back of the head straight through the next top hole to the right of your anchoring knot. Pull the string through the next diamond from the front to back, keeping the string to the left of loop as you pull it through, so the end of the string can cross over the top of your loop. It should look like this:
- Cross the string over itself, and thread it through the same hole from the open side of the head to the back and pull it through the loop you created to lock it in place. It should look like this:
- Skip the third diamond. Go to the fourth diamond, and thread the top string through the middle left top hole using the same method outlined in the step above.
- Repeat this process, spacing the knots out evenly by skipping 1 diamond for each knot. You should have 4 total knots at the top.
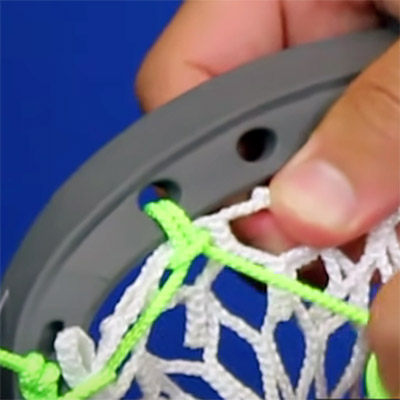
- Once you get to the other side of the head, tie a double knot at the back of the head. The mesh should be even all the way across the head, with a column of diamonds down the middle.
- Cut off any excess top string, keeping about 1/2 inch of slack. Using a lighter, melt the end of the string to prevent fraying.
Step 3 – Basic Sidewall Strings
Please note: different lax stick heads have varying numbers of sidewall holes. If you have a head with fewer sidewall holes, this pattern will lead to more channel.
Important: breaking in the mesh both before and after you string it is going to have a much better result.
You will need 4 basic knots for stringing a lacrosse sidewall:
- Anchor Knot
- Knotted Standard Interlock (SI)
- Stacked SI
- The One
Now that we have the knots outlined, let’s get to stringing…
- Grab 2 sidewall strings. Prepare both strings by putting a double overhand knot at about 1 inch from one of the ends.
- Keep the open side of the lacrosse head facing away from you. Starting again from the left, push the sidewall string through the hole just under the first top string knot. For clarity: push the string from the side facing you through the hole toward the front (or open side).
- Thread the string through the first diamond on the second row of your mesh, and pull back towards you.
- Push the string back through the same/initial sidewall hole, looping once again through the outermost diamond on the second row of your mesh. Pull the string tight, so the side string is anchored in place. This is called your Anchor Knot.
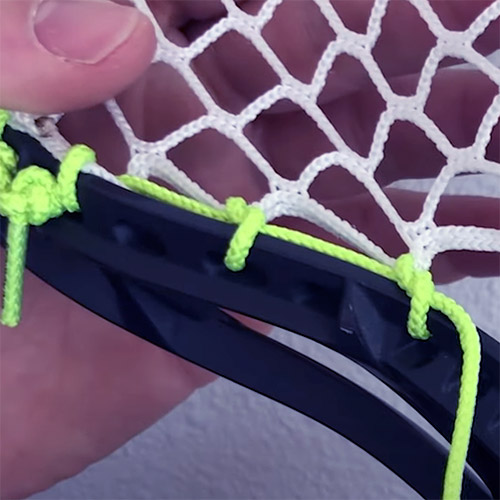
- Skip 2 holes. On the third hole down from the Anchor Knot, thread the string from the back to the front, and loop it through the next outermost diamond on the third row to form a loop.
- Create a pretzel knot and pull the slack out from the inside while keeping a grip on the mesh to hold it firmly against the head’s sidewall to maintain vertical tension.
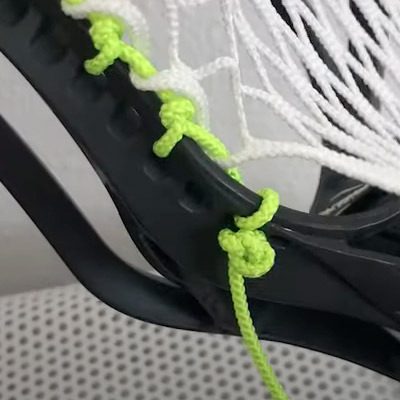
- Skip another 2 rows, and repeat the process above. These 2 knots are called your Knotted Standard Interlock, or SI.
- The first three rows should look something like this:
Tip: Aim to pull the mesh down and toward the inside of the head as you work the side strings.
- Try to maintain tension of the left sidewall string, while you pick up the second side string to prepare to fasten the right side of the mesh.
- Starting this time from the right, push the sidewall string through the hole just under the first top string knot, and create a tight anchor knot.
- Move 3 holes down from the anchor knot. Create 2-3 SI knots on the right side using the same method as outlined above. Remember to pull the slack out from the inside, and hold the mesh firmly against the head’s sidewall to maintain vertical tension.
Check your progress.
- Make sure both sides now have equal tension. You should start to see your channel forming. Tight knots will make a better channel. Use your lacrosse ball to stretch the mesh and set the knots in place.
It’s time to double up! This is a tricky step, so be patient.
- Thread your side string under the next mesh diamond first. Then pull it through sidewall back to front. Thread the string back under the diamond below the one you just threaded, and pull it back out of the top again. The mesh should situate itself right on top of the knot.
- Skip a hole, and repeat this knot, so the mesh rests on top of the knot.
- Bunch those two diamonds together to create a “double up” and pull it tight. It should look something like this:
- Repeat the double up knots on the right side of the sidewall.
Get ready for the Stacked SI knot
The Stacked SI knot has been a secret weapon for lax players who want more control on their passing or shooting whip.
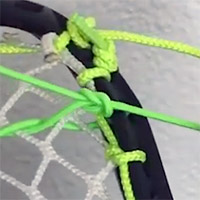
- Returning to the left side of your stick head, thread your side string from left to right through the next 2 rows of diamonds. Skip a side hole to pull the string through the sidewall hole from back to front, keeping the string to your right.
- Pull the string through the loop you created, making another pretzel knot. Take the slack out like you did for the SI knot, and pull tight.
- Now reverse course and weave your string back through the same diamond (front to back) and the diamond in the previous row UP.
- Keep the string down toward the neck, so the knot stays on top of the mesh, facing you.
- Thread the side string through the next side hold down from back to front, and make another pretzel knot to fasten this section down.
- You should be almost to the bottom of your left side wall.
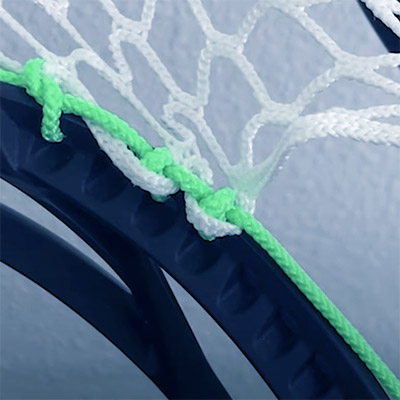
- Repeat the Standard Interlock knot until you get to the final hole, and repeat the process on the right side.
- Tie off your final knot by pulling the string from the front to the back, and creating a double knot at the back of the sidewall. It should look something like this:
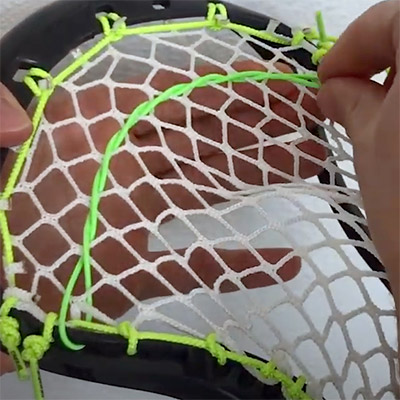
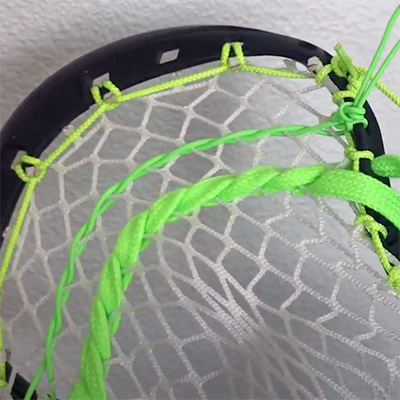
Step 4: The Pocket
- Once you complete the left and right sidewalls, a pocket will start to form. Keep the mesh stretchable by wetting it with warm water.
- Pick up your lacrosse ball, and throw it in and out of the head on both sides to break the mesh in.
Pro Tip: place the lacrosse ball in the mesh, and hold it in place by sliding a wooden spoon or butter knife across the face of the head. Leave it in place 10 to 60 minutes to create a really nice pocket. Don’t worry if it seems too deep at first. We will adjust this with the bottom string.
Step 5: The Bottom Lace (aka the Throat Lace)
- First, identify the first 9-diamond row right below the last place you connected the sidewalls.
- Grab your bottom lace (will look like a shoelace), and make a knot approximately 1 inch from the end.
- With the head still facing away from you, pull up the mesh, so you can clearly see the bottom holes.
- Starting from the left, thread the bottom lace under the first throat hole and the first diamond of the 9 row. Pull it through while keeping the lace flat.
- Count over 5 diamonds, and thread the throat lace the middle diamond from back to front.
- While keeping the lace relatively flat, thread it from the bottom to the top of the throat hole. Pull the lace toward you, keeping the lace to your right.
- Now thread the lace from the top to the bottom of the next throat hole.
- Pull the thread up through the 5th diamond again from the front to the back of the mesh.
- Cross your bottom lace over to thread it through the last diamond in the same row, and down through the last throat hole.
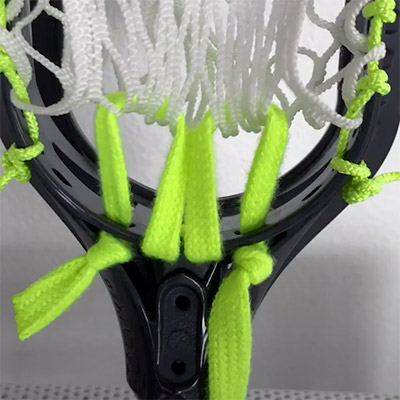
Tip: At this point you should have 2 symmetrical loops at the bottom of your lacrosse head
- While keeping about 3/4 inch slack from the mesh to the throat, tie off your throat lace with a simple overhand knot. It should look something like this:
Step 6: Lace Your Shooters
Tip: Shooter laces help you customize the way you throw and shoot the ball. They must be laced within 4 inches from the top of the scoop.
- You’ll need 1 shooter lace and 1 nylon shooter string for this step. If your kit only has a shooter lace, you may use the extra sidewall string as a shooter nylon.
- Starting with the head facing away from you, thread the nylon shooter string through second sidewall hole (under your first sidewall knot) from the outside to the inside. We will call the end of the string you originally pick up as the “leader.” The other end of the string is your “tail.”
- Pull the shooter string up through the first diamond in the first 9-diamond row.
- Grab the tail, and thread it down through the same 9-diamond hole and up through the next hole in the same row.
- Grab both ends of the string, and lightly pull so that you have a half-folded string.
- Thread the tail down through the second hole and up through the third hole.
- Thread the lead up through the third hole, and down through the fourth. Repeat this across the row to create something that looks like this:
- Once you get to the end, pull the bottom end of the string through the second sidewall hole from the front to the back of the head.
- Tie off the ends with a square knot, topped with a double overhand knot. Keep the string tension of the shooter string even across the row.
- Grab your shooter lace, and thread it down through the third side hole and up through the first diamond in the next 9-diamond row below the shooter string.
- Thread your shooter lace in the same barrel pattern that we used for the nylon string. Keep the lace flat against the mesh, so you final row looks like this:
- Just like your shooter string, tie off the ends of the lace with a square knot, topped with a double overhand knot. Do not pull too tightly. You want the tension even across both laces.
Pro Tip: Test your strings! Loosen the shooter strings if you feel the ball is coming out too early (too much whip). Tighten them if you want to increase your whip.
Testing your strings will also help you break the pocket in while improving your stick skills.
This tutorial is a template for you to get started, but different heads may require different methods. Contact our lacrosse coaching staff if you need more assistance in preparation for lax camp.

Are you interested in more LaX tips from the pros?


